I've been interested in trying my hand at Paper Chef for a while. It's a blogging event/contest hosted by Owen at Tomatilla! and anyone can participate. It works like this: On Friday we're given a set of four ingredients to use and we have to come up with a dish over the weekend. I may not have picked the best month to join in because two of the four ingredients this time were not vegan, but Owen very thoughtfully allows substitutions to be made for vegetarians and people with food restrictions.
These are the four ingredients, and what I decided to do with them:
1. Eggs or anything that reminds you of eggs: I think the most common egg substitute in vegan cooking is tofu, so I chose it.
2. Black fermented soy beans: I just so happened to have a jar of Fermented Black Bean and Garlic Sauce in my fridge, so this was no problem.
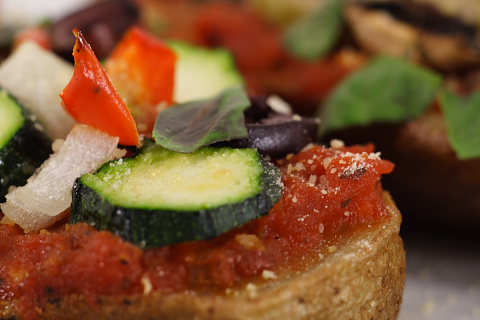
3. Giblets or any form of offal : OK, we have a problem. I mean, people go vegetarian because of giblets! I tried to think what vegan foods could be considered as offal and decided that since offal can be defined as waste material that is thrown away, and it's the time of year where gardens are overflowing with surplus bounty, zucchini would be the perfect substitute. And I actually had zucchini that were just about to be recycled through the compost pile if I didn't find a use for them.
4. Something that reminds you of Africa: When I think of African cooking, I think of peanuts and sweet potatoes (yams). It was hard to decide between them, but I ended up choosing sweet potatoes as my African ingredient.
When I put all those ingredients together in my mind, I kept coming back to the idea of patties or croquettes, filled with vegetables and served with a garlic-ginger sauce. The black bean sauce would lend saltiness and piquancy to the patties, and I decided to use shiitake mushrooms to add an earthy flavor. It was when we sat down to eat that I realized how similar this dish was to Egg Foo Yung, which I hadn't had for years and had forgotten existed. I never would have thought to make this if not for the Paper Chef competition, so thank you to Owen for inspiring me to create this delicious meal.

Shiitake, Sweet Potato and Zucchini Foo Yung
(click for printer-friendly version)
Foo Yung Patties:
1 medium sweet potato, cut into cubes (about 2 cups total)
1 package regular (not silken) extra-firm tofu (about 14 ounces)
1 large zucchini, shredded
2/3 cup green onions, sliced
2 cloves garlic, minced
2 tsp. ginger, grated
1 tsp. dark sesame oil
1 tbsp. fermented black bean sauce
1 tsp. ginger paste
5 shiitake mushrooms, chopped (can use rehydrated dried mushrooms)
1 tsp. sriracha sauce or other chili sauce
1 tsp. salt
1 1/2 tbsp. corn starch
baby spinach leaves and sliced green onions for garnish
Sauce:
1 cup water
2 tbsp. soy sauce
2 tsp. corn starch
1 tsp. minced garlic
1 tsp. grated ginger
1/4 tsp. sesame oil
1/2 tsp. vegetable bouillon
3 shiitake mushrooms, diced or sliced
Foo Yung Patties: Cover the sweet potato cubes with water and cook until tender. Drain the water and mash the sweet potatoes well. Set aside.
Press as much water as you can out of the tofu (if you have time, place it between towels put a weight on top of it for about a half hour). Use a potato masher to mash it thoroughly, so that no large chunks remain. Mix it with the sweet potatoes.
Heat a small non-stick skillet and add the sesame oil, zucchini, onions, garlic, and ginger. Cook until the zucchini softens, about 4 minutes. Remove from heat and add to the tofu-sweet potato mixture.
Add the remaining ingredients (except the garnish) and mix thoroughly.
To cook the patties, you can either pan-cook them (recommended) or bake them. The pan-cooked ones come out much more tender, but they have to be cooked in smaller batches.
To pan-cook, lightly spray a large, non-stick skillet and heat it over a medium-high burner. Form the tofu mixture into patties about 3 inches in diameter and 3/4 inch thick. Cook until well-browned and then turn, carefully, to cook until browned on the other side. Keep the cooked patties warm as you continue to cook the others.
To bake, preheat the oven to 400. Place the patties (see above) on an oiled baking sheet. Cook for 15 minutes, then turn and cook for 15 more minutes.
Sauce: Mix all ingredients in a small saucepan. Cook over medium-high heat until mixture boils, becomes translucent, and thickens. Serve immediately.
Serve the Foo Yung Patties on a bed of baby spinach, topped with sauce and garnished with green onions. Enjoy!
Serves 4.

And I hope it's not bad blogging etiquette to tag this for another event, Sweetnicks ARF/5-A-Day Tuesday, which encourages us to eat our veggies. Sweet potatoes are a great source of Vitamins A and C!
Tags: vegan recipes vegetarian cooking food low-fat Paper Chef #21 ARF/5-A-Day
Labels: gluten-free, soy


 Peel and core the apple and cut it into wedges about 1/4 to 1/2 inch thick. You will want them to be as thick as possible while still allowing you to seal the wonton around them, so cut one or two and try them first.


 If you're unfamiliar with shirataki noodles, they are clear, gelatinous noodles made from the starch derived from the konjac plant. (The primary component of the konjac root is glucomannan, a soluble dietary fiber.) People are getting excited about shirataki because the noodles have practically no calories or carbs--they're all fiber and water. You can enjoy them like traditional noodles, but without the guilt.
 Shirataki noodles come packed in water that you drain off before cooking. Prepare yourself before you open the package. Every package I've bought has had a fishy smell (which I hate). I keep a colander ready, pour the noodles into it, and rinse them immediately. Then I boil them for at least one minute, often with some kind of seasoning (soy sauce, garlic, bouillon). The fishy smell goes away and leaves no fishy taste.
 Use kitchen shears to cut the noodles (if you're using the spaghetti-like kind). Doing this after rinsing and before boiling is easiest.
 They don't absorb sauce like regular noodles do, so you don't need as much sauce--or at least as much liquid in the sauce.
 Don't believe what other websites say: Shirataki noodles are not very filling. That's been my experience, at least. Plan on using at least one of
 For more information about shirataki, be sure to check out the articles linked on


